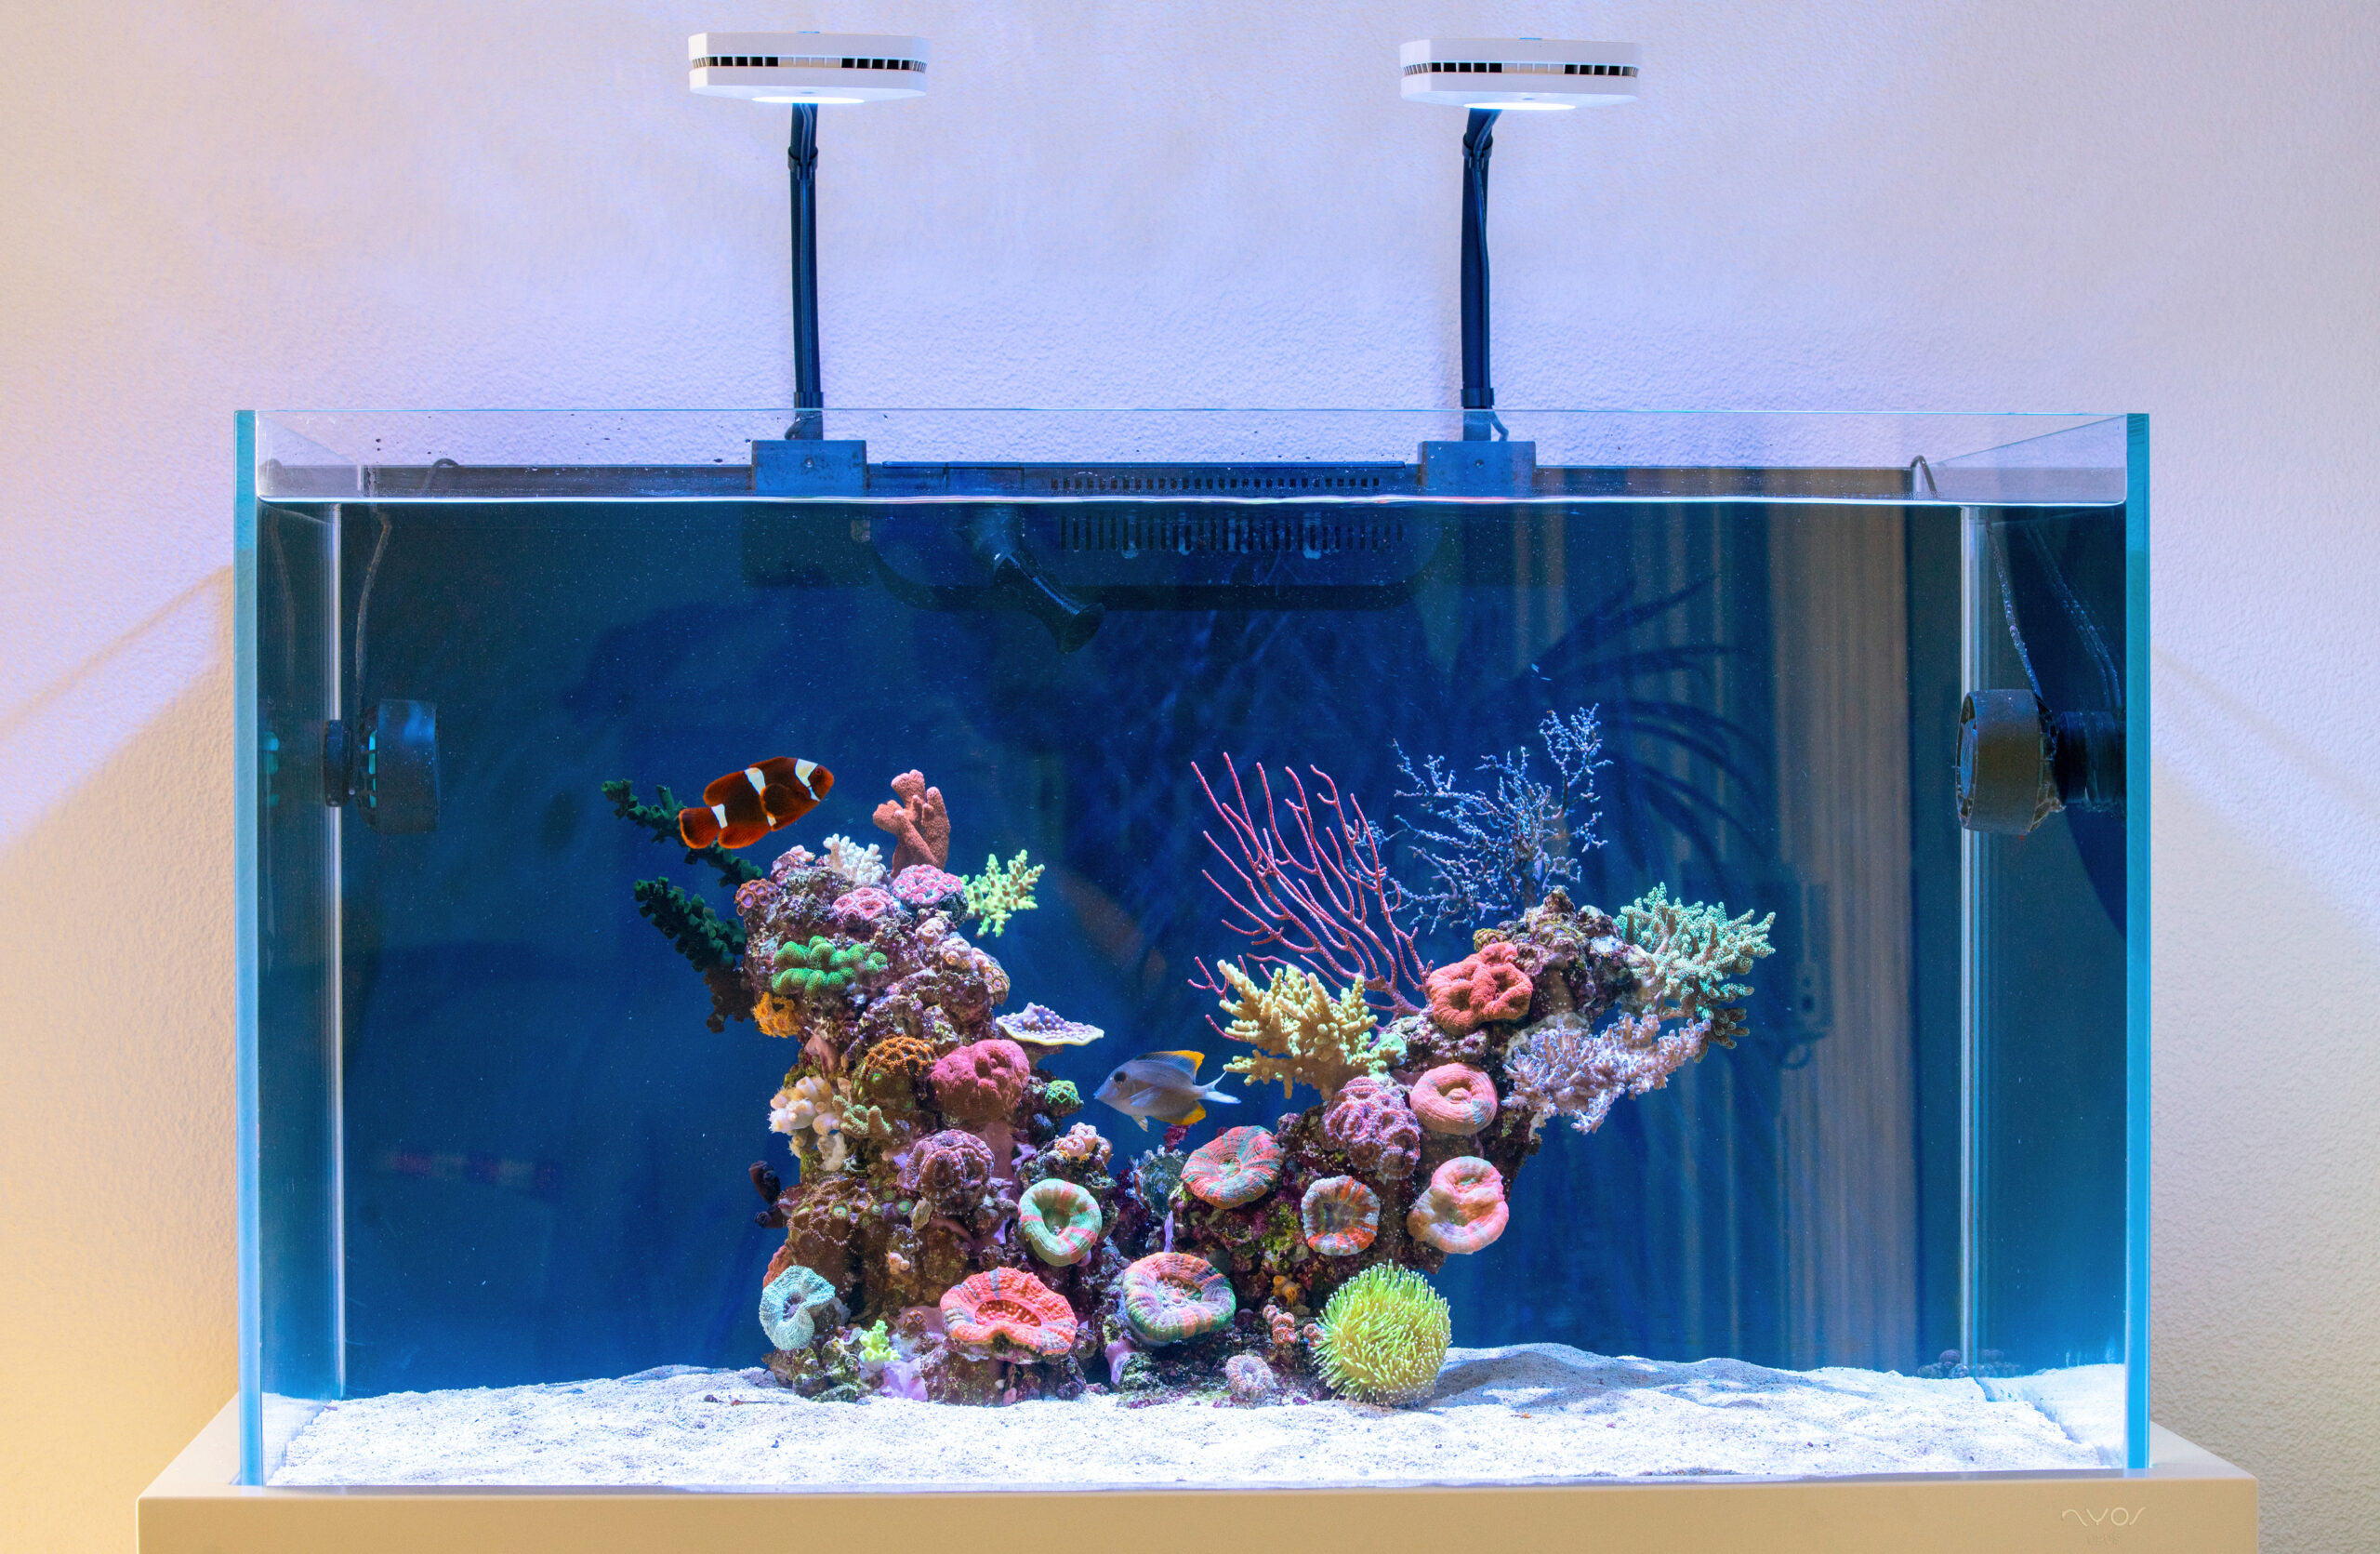
The process of building a coral reef—one could write books about it. And if anyone were to write such a book, it would certainly be Dave Notter (31) from Bern, Switzerland. He built a beautiful hanging reef.
We often see aquariums consisting of a pile of rocks, either carelessly tossed on top of one another or arranged to form a sort of pyramid. We also regularly see the famous reef pillars—large pieces of rock stacked on top of one another to form a tower. Rarely, however, do we see a floating reef. Notter is making a big splash with his design, which he is presenting here for the first time.
In a Red Sea MAX Nano, Notter is setting up a hanging reef. It’s not his first creation. Notter has been active in the hobby since 2014. “My brother already had an aquarium, and I couldn’t be left behind.” That first tank was a hodgepodge of corals and fish, but Notter learned from the experience.


Setback
His current aquarium soon followed, though it originally looked a little different. “It was a sort of overhanging pyramid, covered with a hundred corals.” That design had already earned him applause, but when disaster struck, Notter saw an opportunity to iron out a few sticking points.
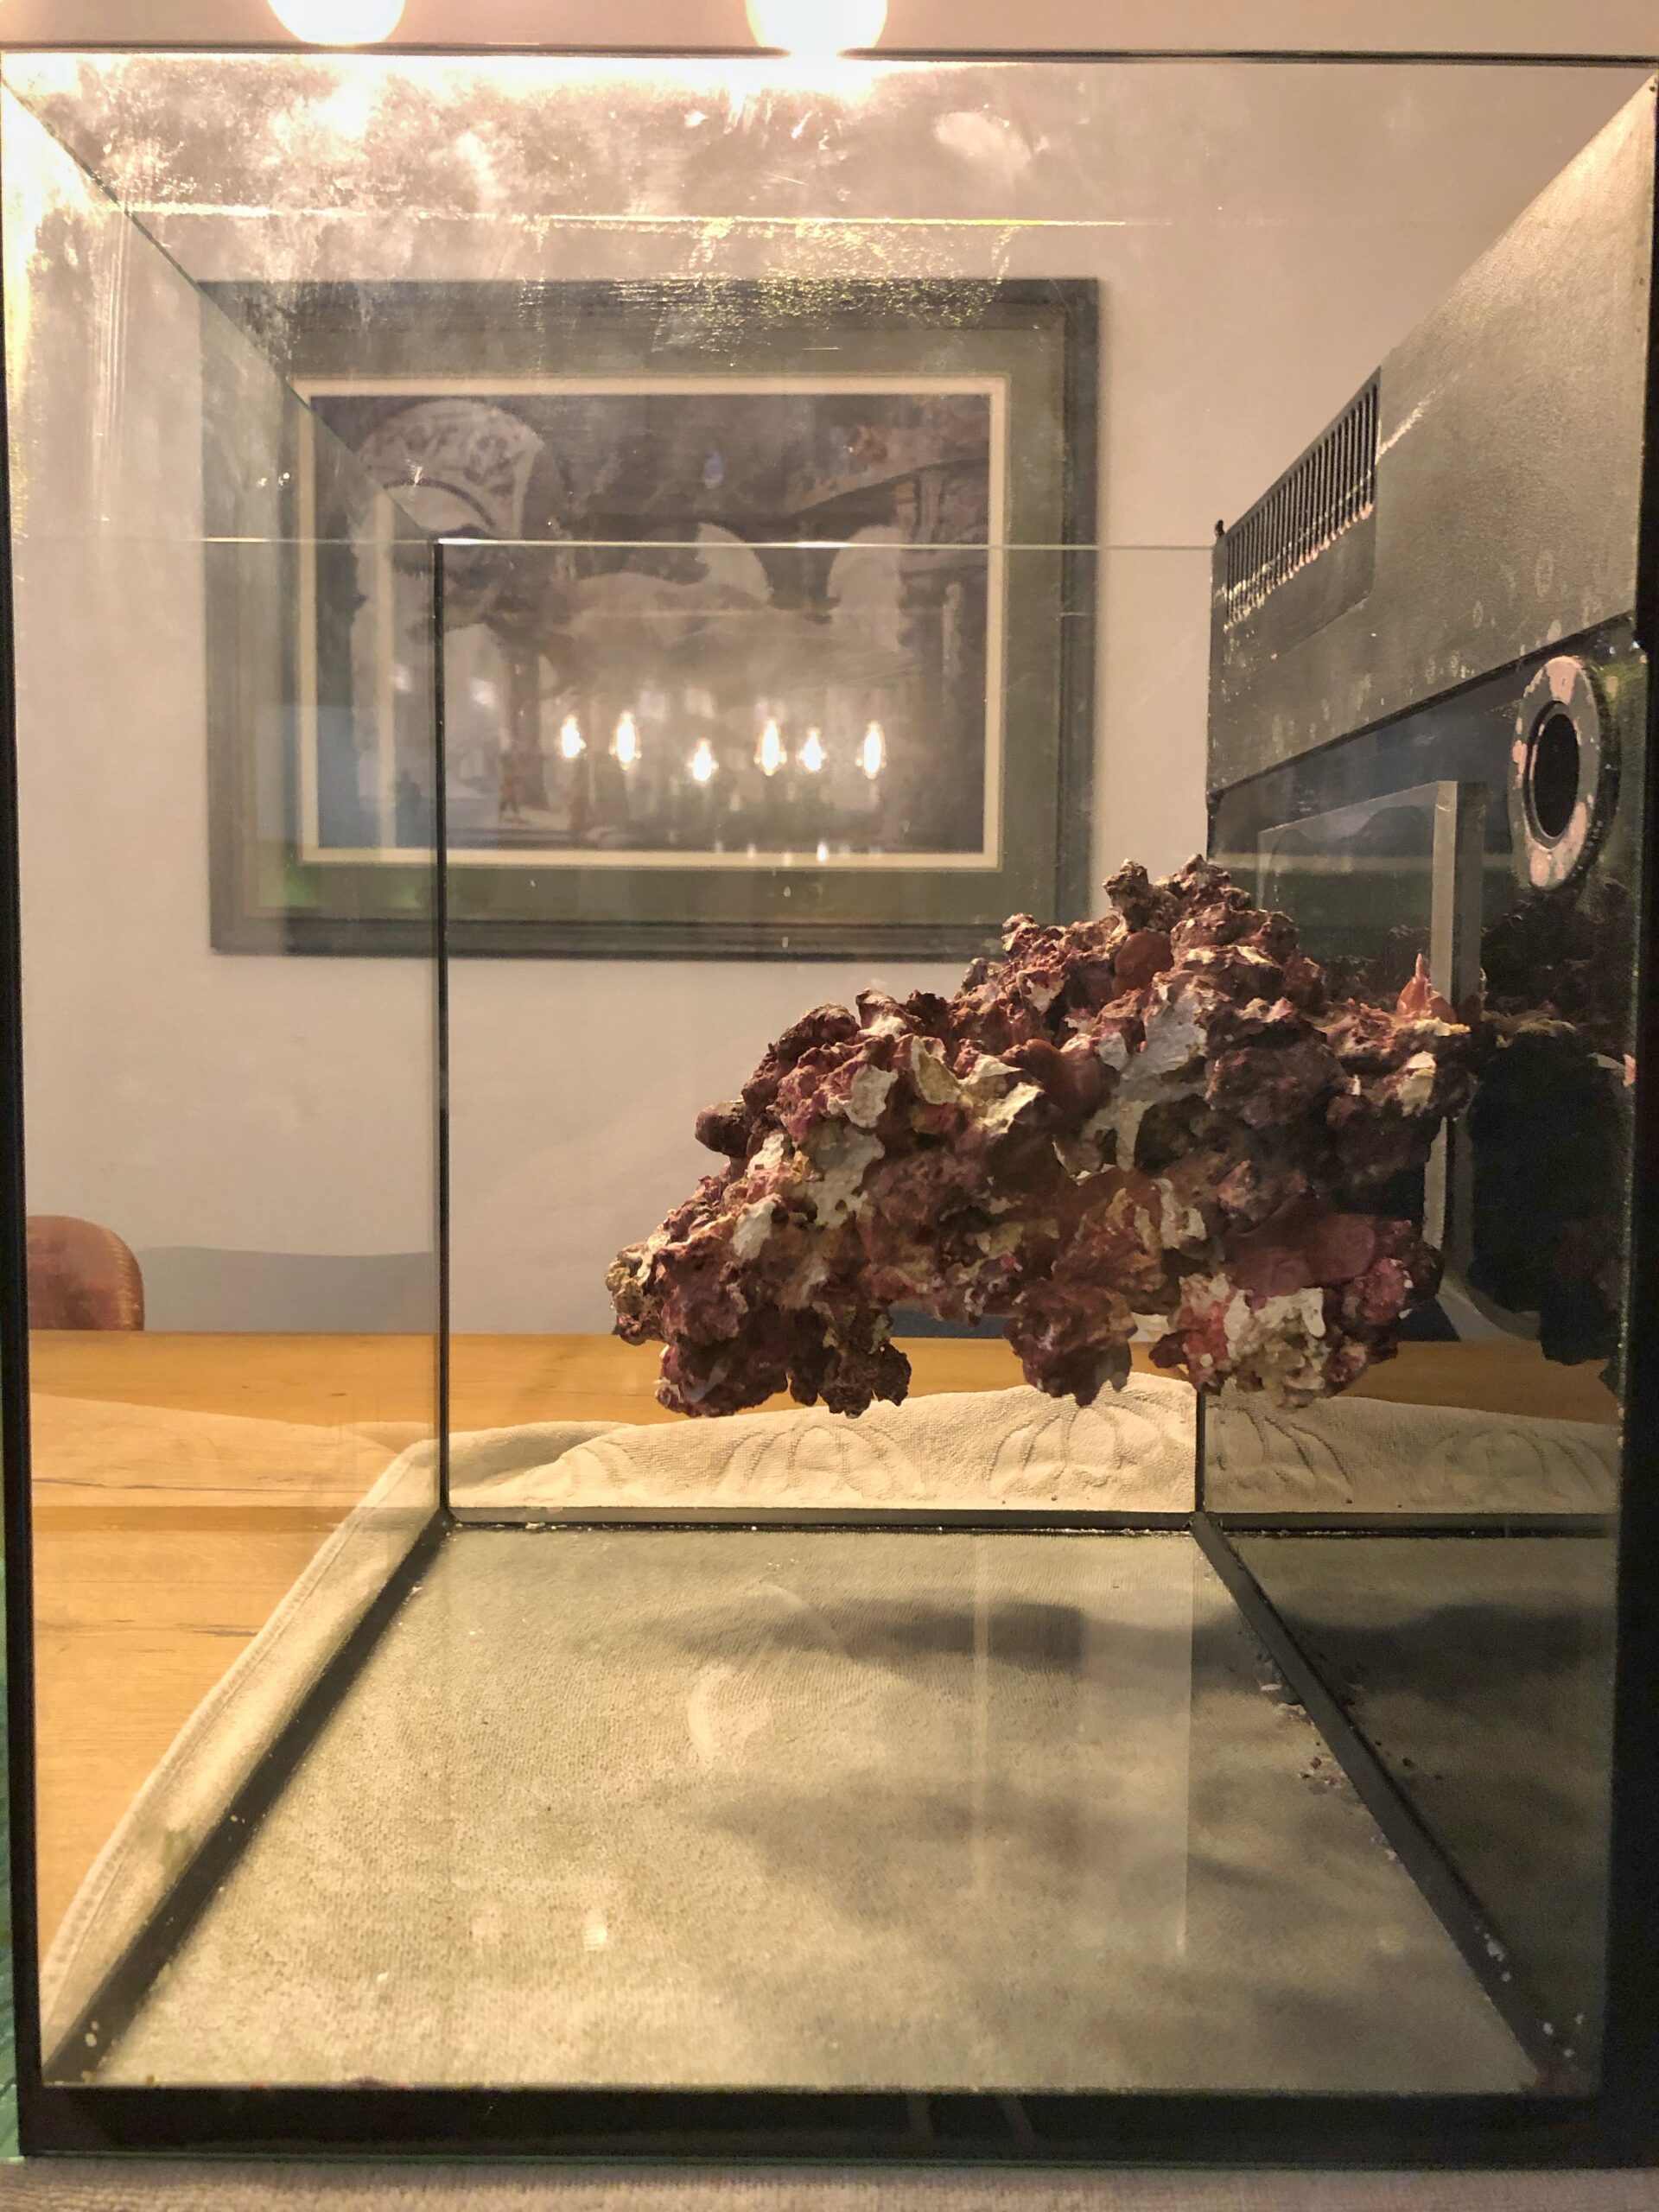
“First and foremost, the aquarium looked very dark. On top of that, the rock was unstable because I had never secured it,” says Notter. “The worst part, however, was that detritus was accumulating everywhere.” When the overhanging part of the rock collapsed while he was placing a new coral, Notter decided to tackle the problems head-on. A new aquascape was born.
Plexiglas and silicone
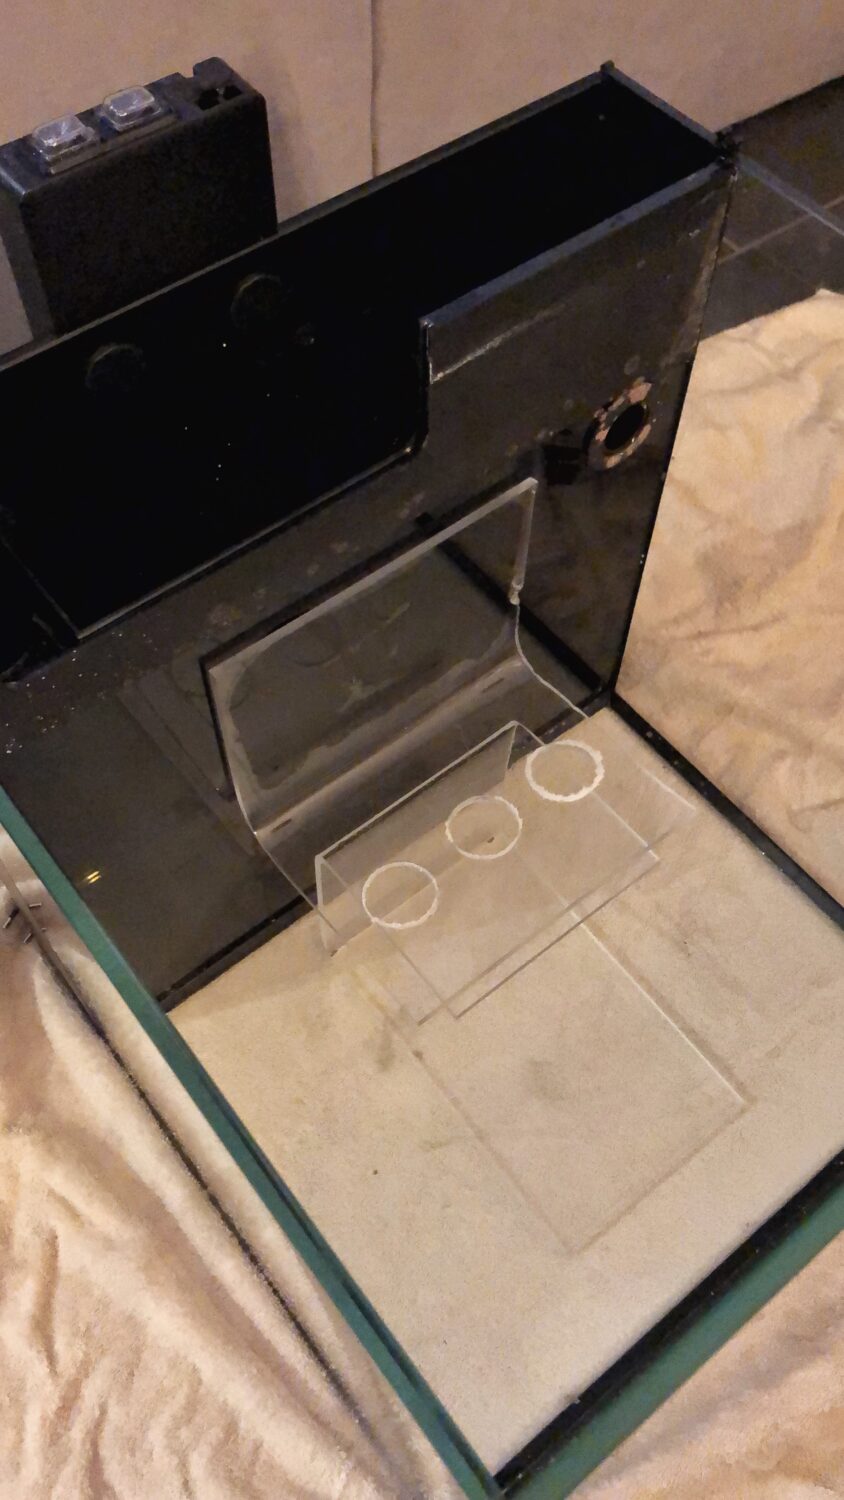
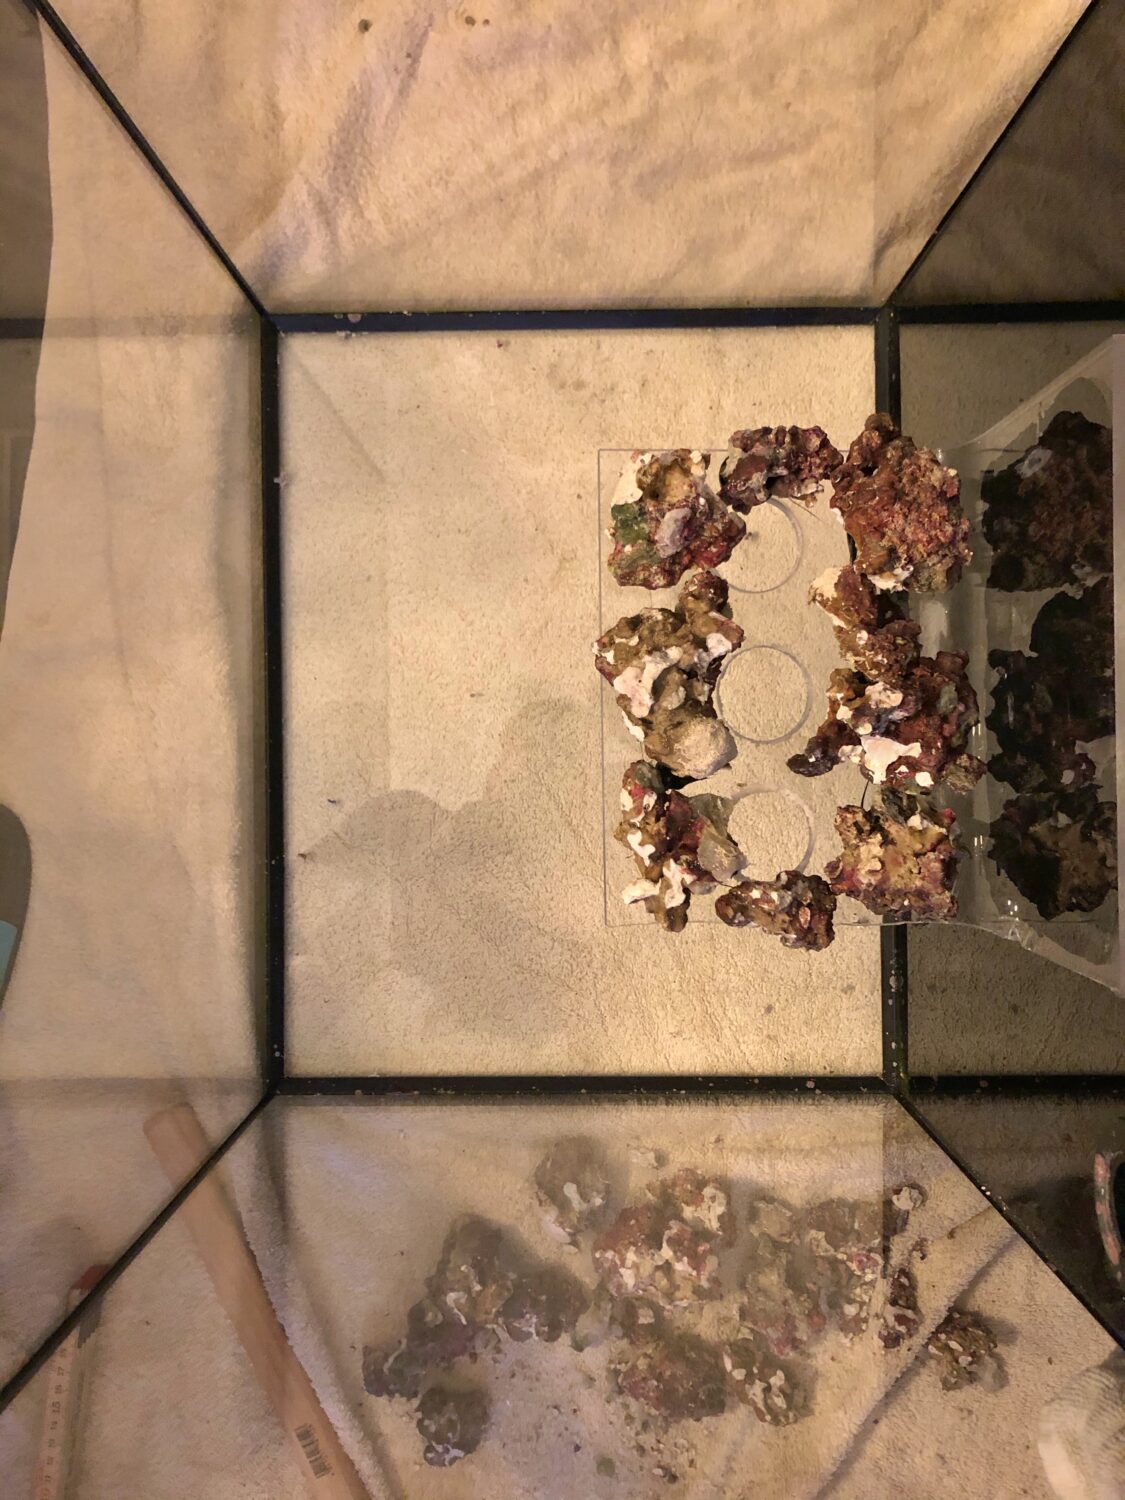
“I started working with a 5-mm-thick sheet of Plexiglas measuring 40 by 20 cm,” says Notter. “Using a heat gun, I bent the sheet to a 90-degree angle, then drilled a few holes through it.” Using plenty of silicone, he permanently attached the sheet to the back wall of the Red Sea MAX Nano. The foundation of the overhanging reef took shape. “A few drill holes later, and I could be sure of good water flow behind the rocks.”
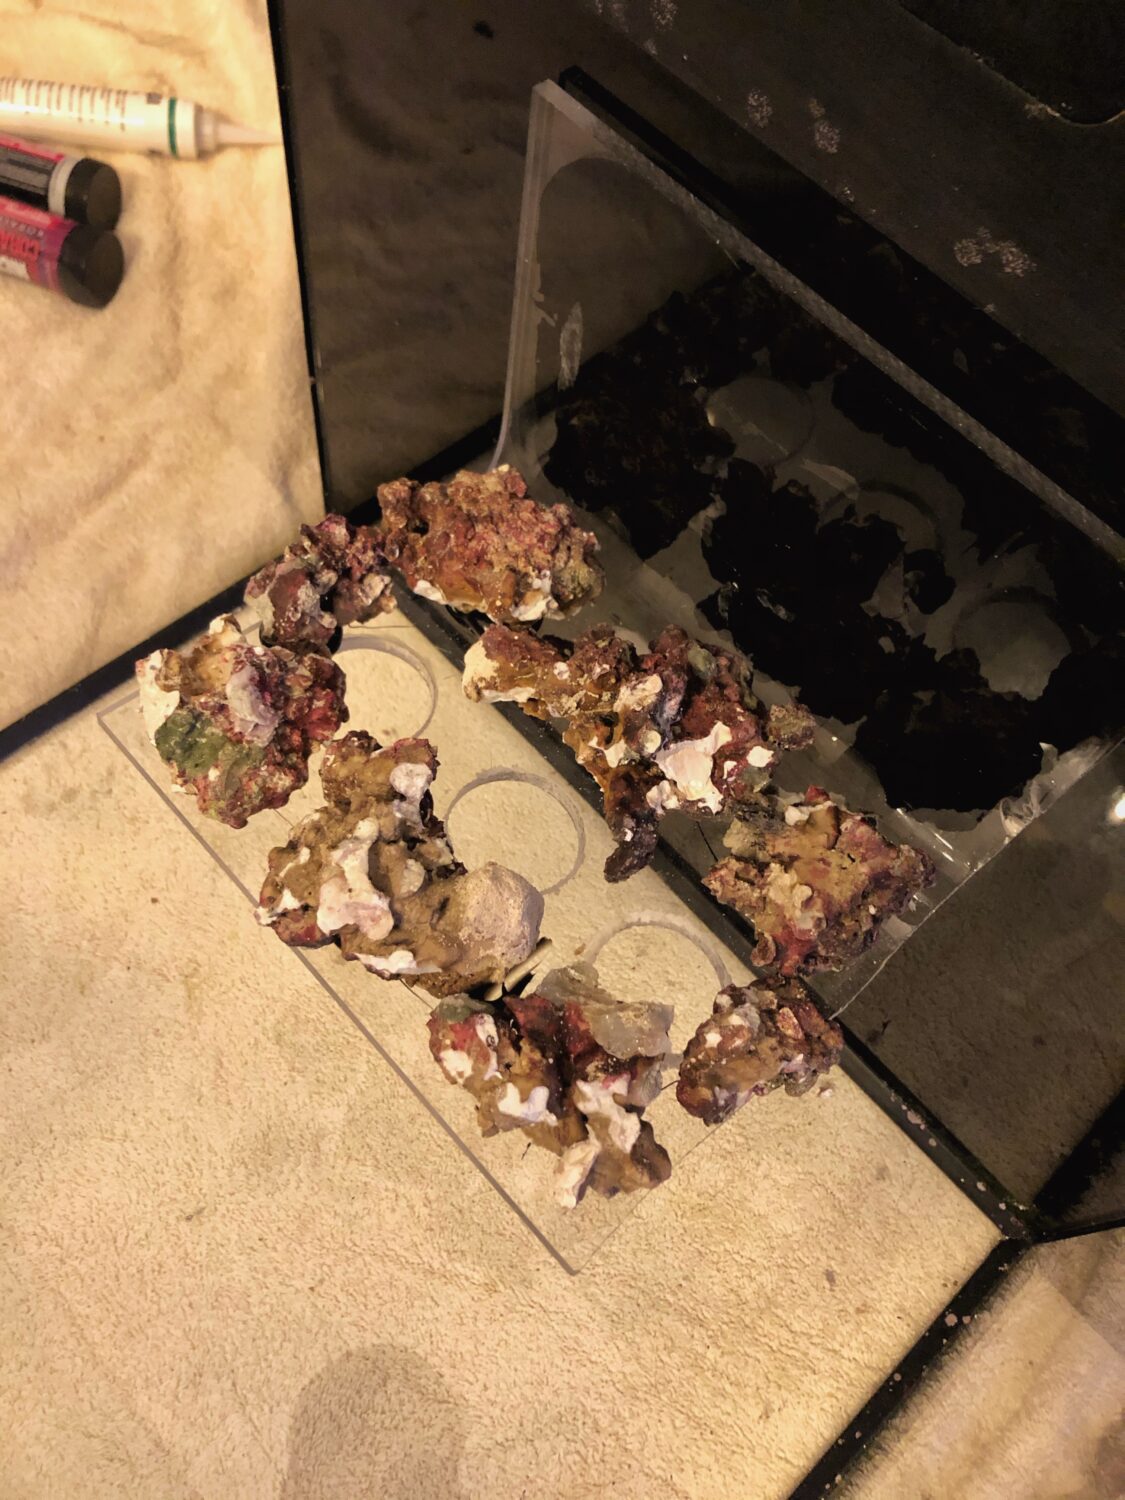
By carefully stacking the rocks on the Plexiglas sheet and gluing them together, the reef took shape. “One problem was that I wasn’t starting from scratch. I already had corals and fish, but no aquarium to put them in while I was working on the new scape.” However, a local dealer helped him find an identical aquarium to bridge the 48-hour drying period. “Afterward, I returned the aquarium.”
Scoly Mania
It’s worth noting that the aquarium is filled with twelve Scolymia corals, a personal favorite of Notter’s. “They have very intense colors and aren’t very aggressive. They’re also easy to care for, and they don’t grow very fast, which makes them perfect for a nano aquarium.” The Scolymia come directly from Australia.
In addition, there are also Funghia, Acanthastrea lordhowensis, various Acropora, Pavona cactus, Seriatopora caliendrum, Zoanthus, and various soft corals. A Tridacna crocea, Archaster typicus, Percnon gibbesi, and Sabellastarte magnifica add some nice accents. “There are only three fish in the aquarium: one Doryrhamphus excisus and two Chromis retrofasciata.”
Technology
To keep these creatures alive, Notter uses a filter sock, a skimmer, and activated carbon in the rear compartment of the aquarium. An AI Prime provides sufficient light for the inhabitants. Every month, Notter changes 20 to 30 percent of the water. A Tunze Nanostream 6040 provides the water flow.
“I use a dosing pump to dose according to the Arka Aquatics Balling method,” says Notter. “The most important thing, however, is that the water parameters remain constant and don’t fluctuate too much. Keeping an eye on the corals is important—sometimes even more so than the tests you run.”
The entire project cost just under 200 EUR. “The piece of plexiglass cost me 15 EUR. The glue and silicone cost 50 EUR, and the new Real Reef rocks set me back 120 EUR.” In our opinion, those costs were more than worth it.